Navigation menu
hello Guest

Administrator Manual
Settings Menu
- Manage Profile: To manage student's profile, click the settings menu parallel to the student's name/address. The Set Profile modal box will open. Provide the required details and click the Save button.
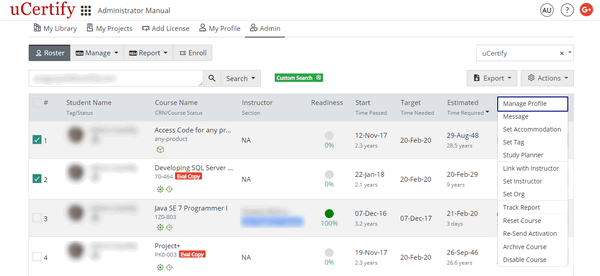
Figure 2.15: Roster tab with Manage Profile Option
- To change student's password, click the Change Password tab. Provide the new password and click the Save button.
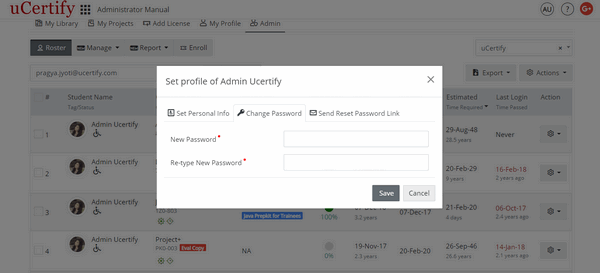
Figure 2.16: Set profile Modal Box with Change Password Tab
- To send the reset password link to the student, click the Send Reset Password Link tab and click the blue button. The name of the blue button will change as per the user email address.
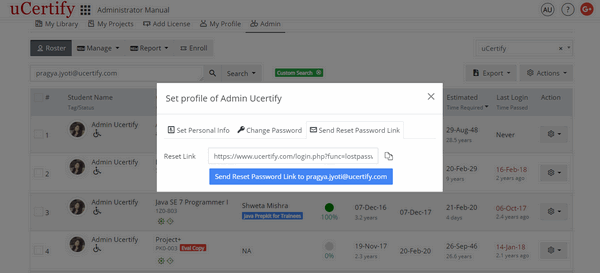
Figure 2.17: Set profile Modal Box with Send Reset Password Link Tab
- Send Message: To send message to your students, click the settings menu, and select the Message option. Type the message subject and the message to be send and click the Send button.
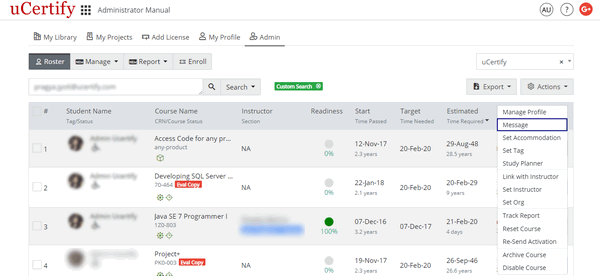
Figure 2.18: Roster Tab with Message Option
- Set Accommodation: To manage the time allowed for timed activities in the desired course, click the settings menu parallel to the course, and select the Set Accommodation option.
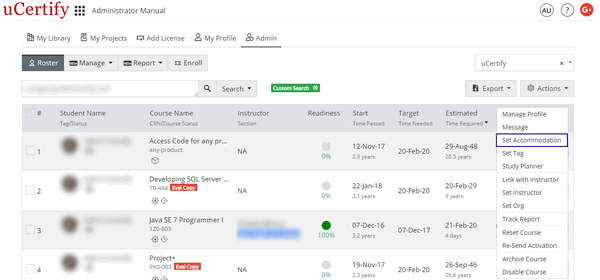
Figure 2.19: Roster Tab with Set Accommodation Option
- The Set Time Accommodation modal box will open. Select the required time allowed and then click the Submit button.
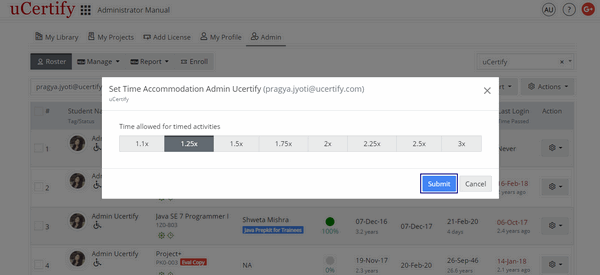
Figure 2.20: Set Accommodation Modal Box with Submit Button
- Set Tag: To tag the desired student, click the settings menu, and select the Set Tag option. Set the student tag and click the Save button.
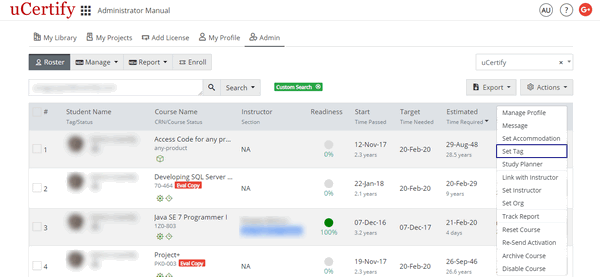
Figure 2.21: Roster Tab with Set Tag Option
- Study Planner: To view the student’s study planner, click the settings menu, and select the Study Planner option.
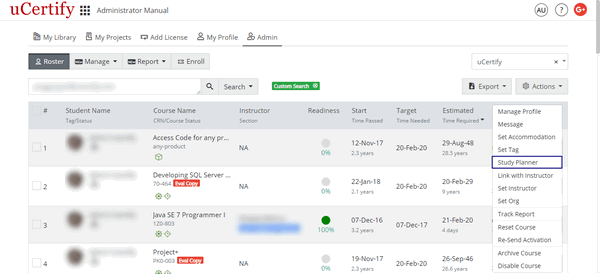
Figure 2.22: Roster Tab with Study Planner Option
- Link with Instructor: To link the course with the instructor, click the settings menu, and select the Link with Instructor option. Provide the Section Key and click the ADD button.
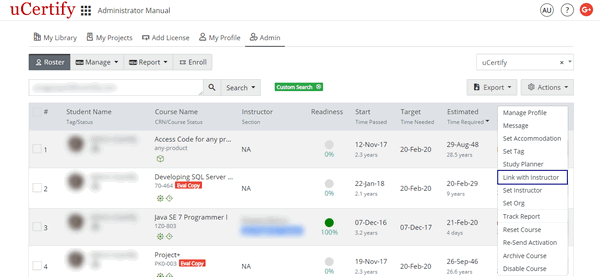
Figure 2.23: Roster Tab with Link with Instructor Option
- Set Instructor: To move the student under new instructor, click the settings menu, and select the Set Instructor option. Select the desired instructor from the Choose Instructor drop-down and select the desired section from the Choose a section drop-down. Click the Save button.
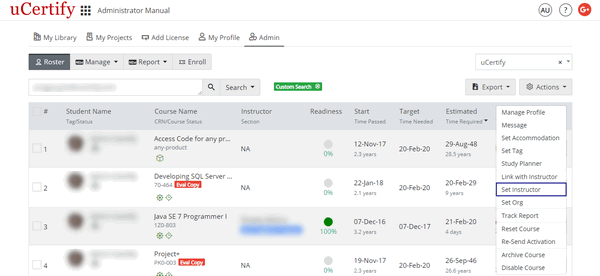
Figure 2.24: Roster Tab with Set Instructor Option
- Set Org: To move the desired student to other organization, click the settings menu, and select the Set Org option.
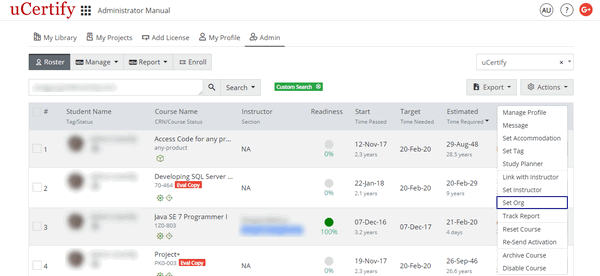
Figure 2.25: Roster Tab with Set Org Option
- Track Report: To view the track report of different components in a course, click the settings menu parallel to the course name, and select the Track Report option. Click on the desired course components to view the report.
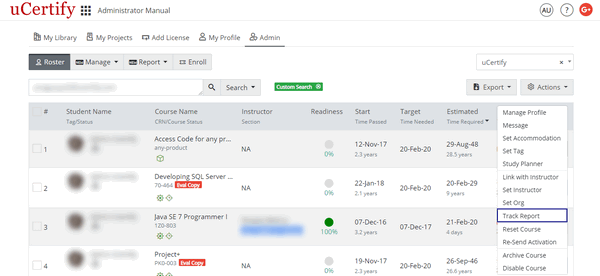
Figure 2.26: Roster Page with Track Report Option
- Reset Course: To reset the course, click the settings menu, and select the Reset Course option. Reset Course modal box will open. Provide the desired student's email or user guid in Student's Email/User Guid box. If you do not want the user to be notified about the course reset, uncheck the Send email to user checkbox.
If you want to reset the course items, set the Toggle button to Customize and check the the course items you desire to reset and click the Next button. Click the Reset button to confirm.
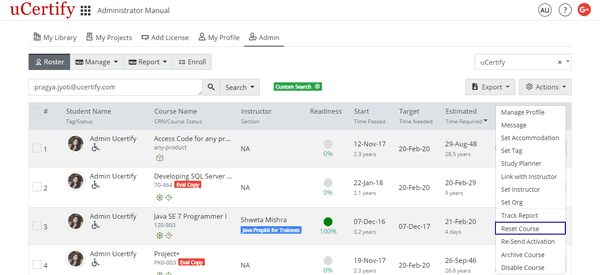
Figure 2.27: Roster Tab with Reset Course Option
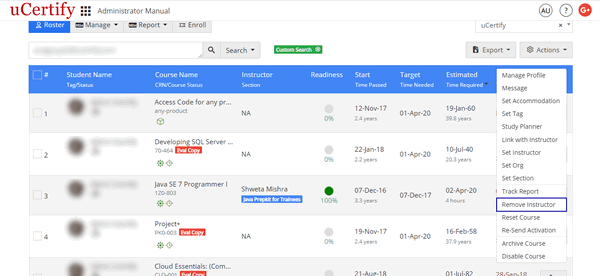
- Remove Instructor: To remove the already assigned instructor to the student, click the settings menu, and select the Remove Instructor option. A confirmation modal box will open, click the OK button to confirm.
- Re-Send Activation: To reactivate the course, click the settings menu, and select the Re-Send Activation option. The Reactivation Email modal box will appear. Click the Send button to resend activation mail.
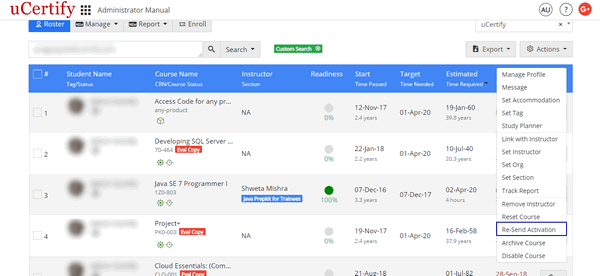
Figure 2.29: Roster Tab with Re-Send Activation Option
- Archive or Disable Course: To archive or disable the student's course, click the settings menu, and select the Archive or Disable option. The Confirmation modal box will appear. Click the OK button.
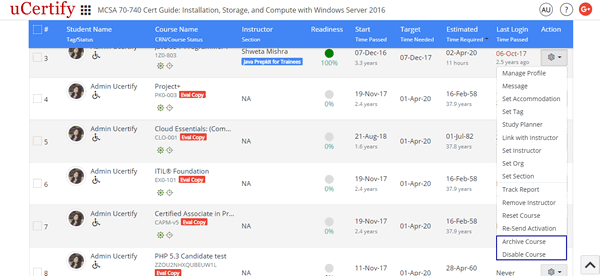
Figure 2.30: Roster Tab with Archive and Disable Course Options